Search the Community
Showing results for tags 'Stax'.
-
Hello all, I'm working on a little project with my old SRD-6 energizer and a cheapo TA2020 amp. I'm trying to put together a compact transportable setup for my SR-5s. I have done a few modifications to this box already, such as wiring the transformers directly to the speaker taps on the back of the box and directly to the Stax socket on the front, completely bypassing the bias board and the loudspeaker switch. Those mods have done great things in terms of sound quality, but what I'm interested in now is modifying the bias circuit to operate as a self biasing one. As I understand it, Stax accomplishes this by tapping some of the output signal from one of the transformers, then passes it through a small transformer to step it up some more before sending it to, more or less, the same bias circuit as in the standard models. This seems pretty straightforward, but in my search for information, I've been unable to track down solid details about what type/values of transformer is used, and if there are any other important components in the self bias circuit (resistors, capacitors, diodes, etc.) that I'm not aware of. Any advice would be greatly appreciated. My ultimate goal is to have a system that runs solely off of 12v dc so it can be run off a battery if need be. Thanks!
- 29 replies
-
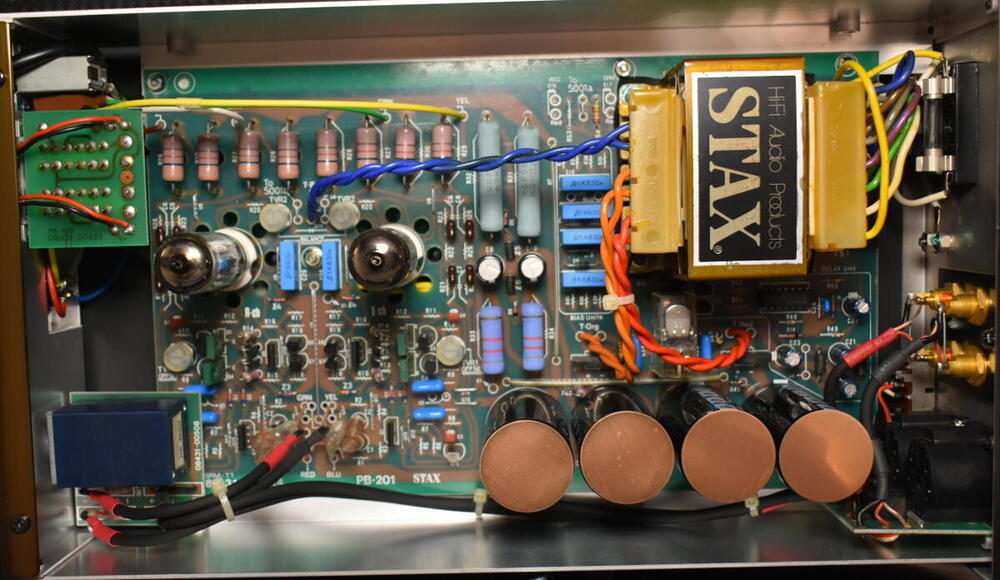
Hi y'all, Got my entry ticket into the Stax world in the beginning of 2018 with a Lambda Signature SR-407 earspeakers / SRM-T1S energizer combo. Got them from a Japanese seller and therefore I'm having to use a 100V step-down transformer for Japanese electronics here in Brazil (power outlets at home are 127V, 60 Hz). Only recently got the nerve to open the energizer to remove some dust and check the components (a bit scared of touching those big-ass 100 uF caps, but an anti-static brush and a lens cleaning blower sort of did the job). As far as I could see, all components seem original: The tubes are Gold Aero 6CG7's, Stax Signature selection. I understand that Gold Aero is not really a tube brand, but they rather select NOS tubes from various different brands. The only info I could get from the tube rear is that they are 6CG7's (not the equivalent 6FQ7) made in USA. (Edit) Comparing the remaining original lettering's shape in the tube rear with pictures from Ebay tube listings pointed to the tubes having in fact been made by Sylvania, most likely in the 1950's. For example, this 1956 6CG7 tube made by Sylvania for Zenith looks exactly the same (apart from the Zenith red print replaced in my case with the Gold Aero print, of course), particularly on the inside: https://www.ebay.ca/itm/1956-Sylvania-Zenith-6CG7-Test-NOS-Grey-Plates-Silver-Shield-Serious-Tubes-L398/174307174026 The tubes have grey plates with a silver center shield and a copper grid. The four, big 100 uF caps at the bottom right are Hitachi (CE W 85oC, 400V), but they baffle me somehow - the exact same cap brand / model looks very different in other people's SRM-T1S's pictures (usually black with aluminum / black top, unlike the bronze "unibody" ones in mine), so I wonder whether there is something special about them or if the different looks are only due to the period they were made. I've noticed that the Alps potentiometer is sometimes mounted in the opposite orientation elsewhere (with the PCB facing up instead of down as in mine). My listening so far showed nothing wrong with the combo (apart from a grounding issue - see 5. below) and I've really enjoyed the experience so far - my only previous contact with electrostatics was listening to Martin Logan ESL's, but the technology has always fascinated me. However, I worry about the long-term maintenance of the energizer, considering its age and my distance from the manufacturer, so I eventually need to learn to fix it myself. I may also consider modding the energizer in the future to improve it if it stops working properly. This leads me to the following questions: How do I identify tube / cap failure, apart from the glowing of the tubes? I have no experience at all in that (in due time: all 4 red LED's inside the energizer are glowing, including the one beneath the Alps potentiometer); Should I need to replace the tubes in the future, which brands are most recommended for my combo? I've seen several people here in the forum recommending prioritizing Japanese brands for a better match - how do they compare to my Gold Aero (Sylvania)s? Should I need to replace the electrolytic caps in the future, which brands are most recommended for my combo? Do I need to worry about the long-term wearing of other components (resistors, diodes, input MOSFETs)? Most likely due to the use of the step-down transformer and the fact that my apartment's power outlets are not grounded (sorry, old building), the energizer suffers from occasional humming when no signal is being fed (I use the balanced XLR inputs from a Fiio X7II DAP, which happens to have balanced output). Any ideas? Would modding the power supply help?
- 107 replies
-
- stax
- maintenance
-
(and 1 more)
Tagged with:
-
Hi all, I was advised by some head-fi members to inquire about the technical aspects of this amplifier here. Do let me know if I'm failing to follow any rules; just trying to avoid any catastrophes! Here are the photos of my amp: https://imgur.com/a/sshHA7B The amp is an 8FQ7 SRM-007t rated for 100v 50/60hz outlets. I have a step down transformer (PowerBright) rated for 120v to 100v, and my outlets are, I believe, 120v at 60hz (American). The transformer works fine with my Japanese SRM-252S, but the fuse has blown 3 times now when turning on the 007t (always the 2nd time it turns on; the first time seems to be working). I've tried debugging this for a bit, hence the 3 blown fuses, but I'm not too sure why since the 007t is rated for 100v in and the transformer is rated for 100v out. Birgir kindly helped me debug this somewhat and believes that the most likely culprit is a short somewhere on the board, but I'm fairly inexperienced with more complex circuit boards and having investigated every individual trace on the board could not find anything that looked like a traditional short. If I'm being honest, the board looks relatively pristine if a bit dusty, which I'm trying to clean myself; could anyone help me figure this problem out? The fuses are 1 Amp / 250V 5x20mm, unbranded. I've since bought a handful of extras from a different brand but haven't yet tried them with the 007t. The tubes look to be vintage GE 8FQ7 / 8CG7 tubes, which are apparently the original tubes the amplifier came with, so I am fairly certain that they're not the problem, but I might have to rebias them as it's quite old. There are 3 red lights in the case and the power button is red; I'm not too sure if the lights indicate anything out of the ordinary. Thanks in advance! E: As far as I can tell, the wiring is for 100v; the fuses are in the 1,3,6 positions. I'm not entirely sure about the colored wires coming from the transformer inside the amplifier, though.
-
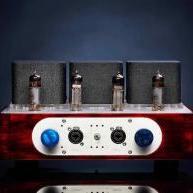
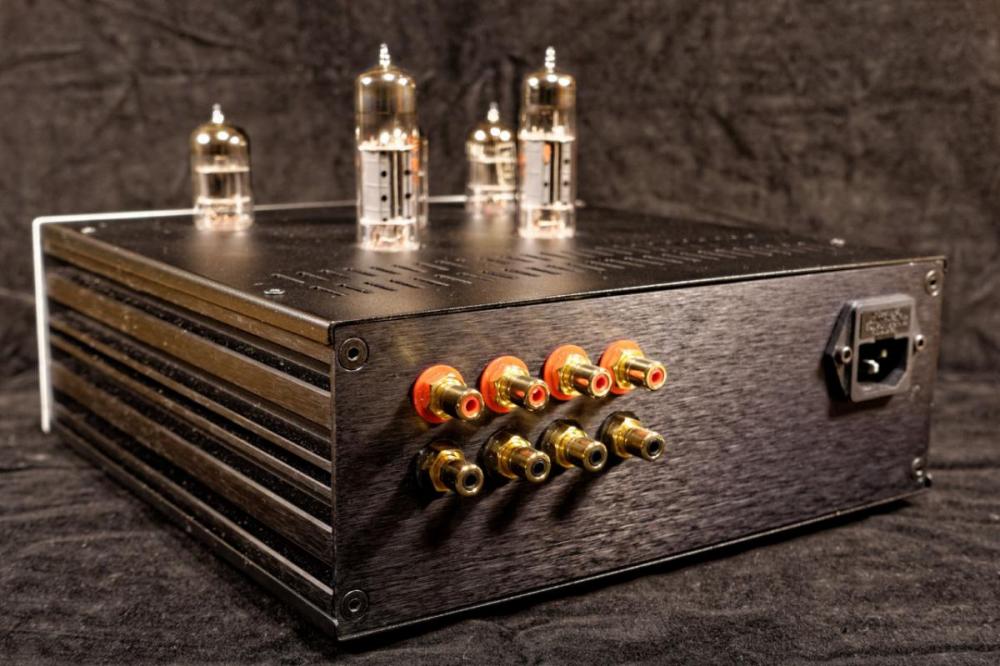
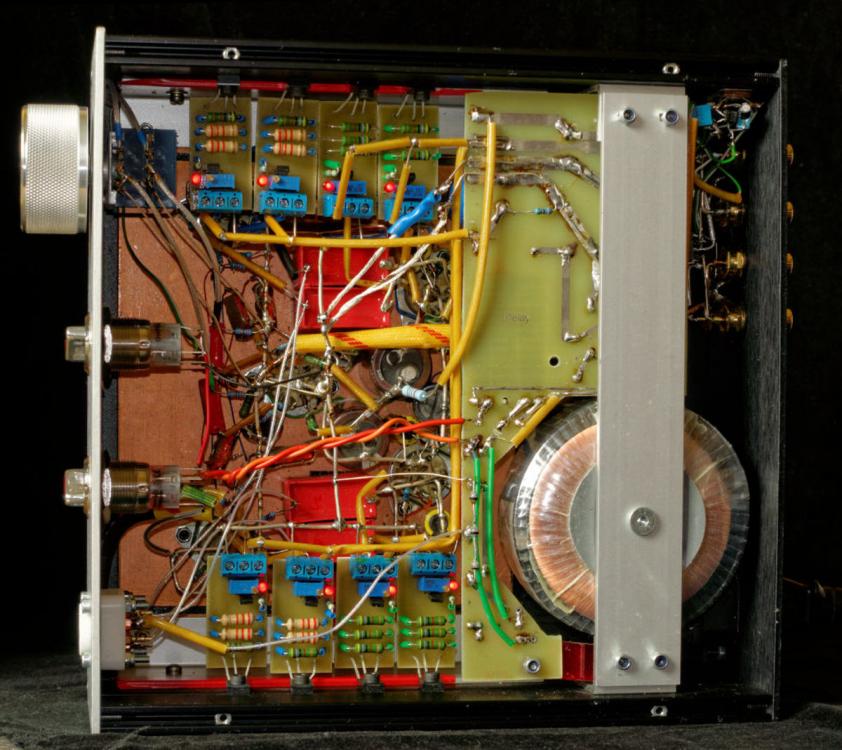
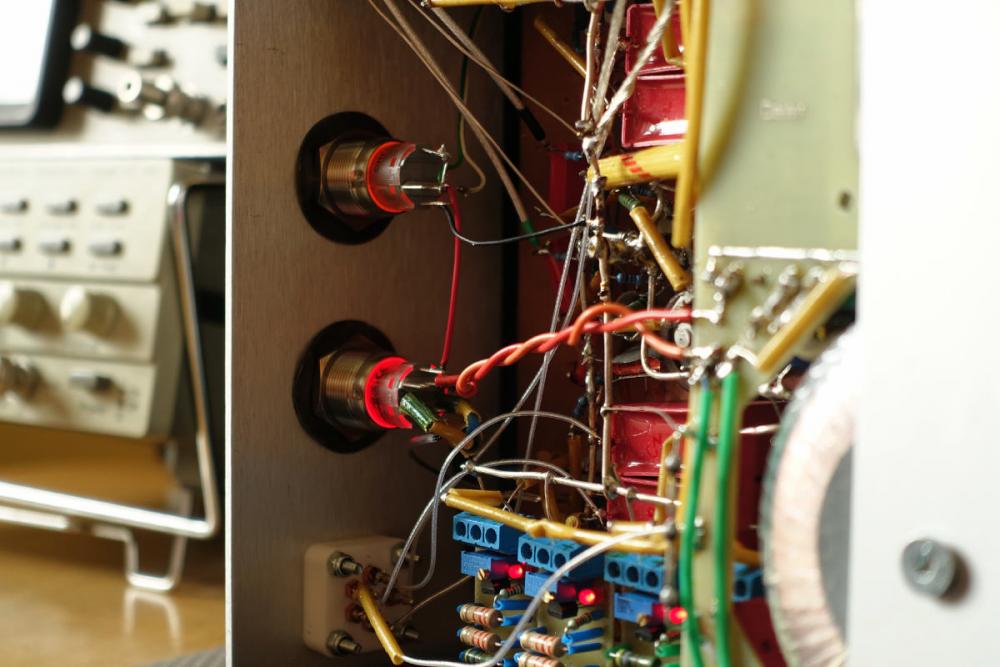
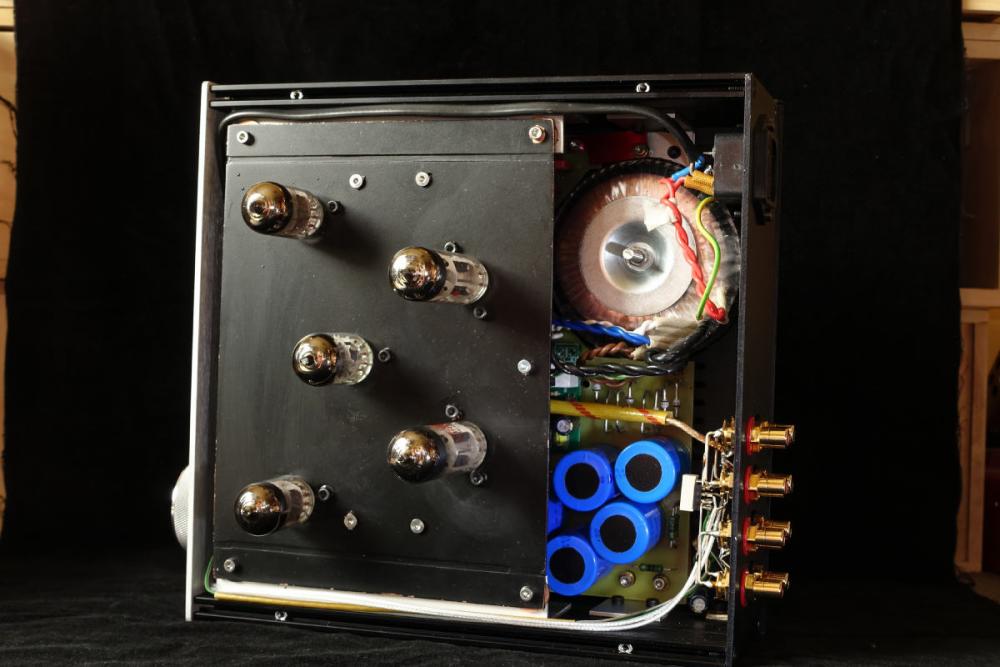
Hi, been lurking for a while but finally signed up! Quick background on my gear: I'm in the Stax ecosystem with an L700(Mk1), SR-3, and an SRM-003. I also have a D10 and T1S, the latter of which was on a shelf unused in the original box for 25 years or so and last year I bought it. I'm still planning to recap it and upgrade it with the constant current mod, but that's to come soon. In the meanwhile, I came across a curiosity online, a homemade normal-bias tube amp. No real info provided, but it was a reasonable price so I took the shot in the dark, and I don't have the electronics knowledge to grok what I'm looking at. Can anyone more educated help me?
-
Hi all, I’ve lurked here for a while but am active in the other regular forum. Apologies for the cold post here, but after a trade and drunken bidding on Yahoo Auctions I find myself with both an SRM-T1S and a 006t (both have pro and normal bias outputs). I would like to get the CCS mod done to one of them, likely the 006 which I would then keep. There’s likely no way in hell I would trust myself to do the mod, though I have JimL’s article. So my post is to find someone who could upgrade my 006t with the CCS mod and whatever other upgrades and updates (and voltage change) you feel would be worthwhile. I’m using it to drive (primarily) an L300LE and a NB Lambda. I have a Hive and an RR1 but I think I just like the Stax sound too much, and will likely sell those to pay for a Sigma. I’m in Los Angeles and so would love to be able to drive to drop this off rather than ship, but am happy to ship too. Thank you, and I apologize if this is not the place to post this. Jake
-
- stax
- stax srm-t1
-
(and 2 more)
Tagged with:
-
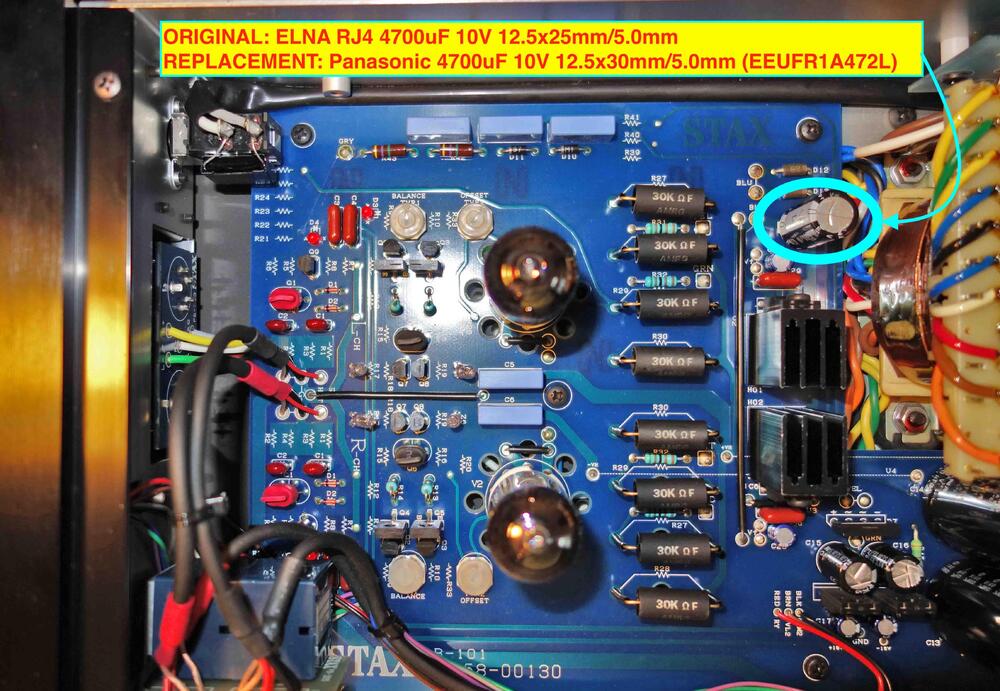
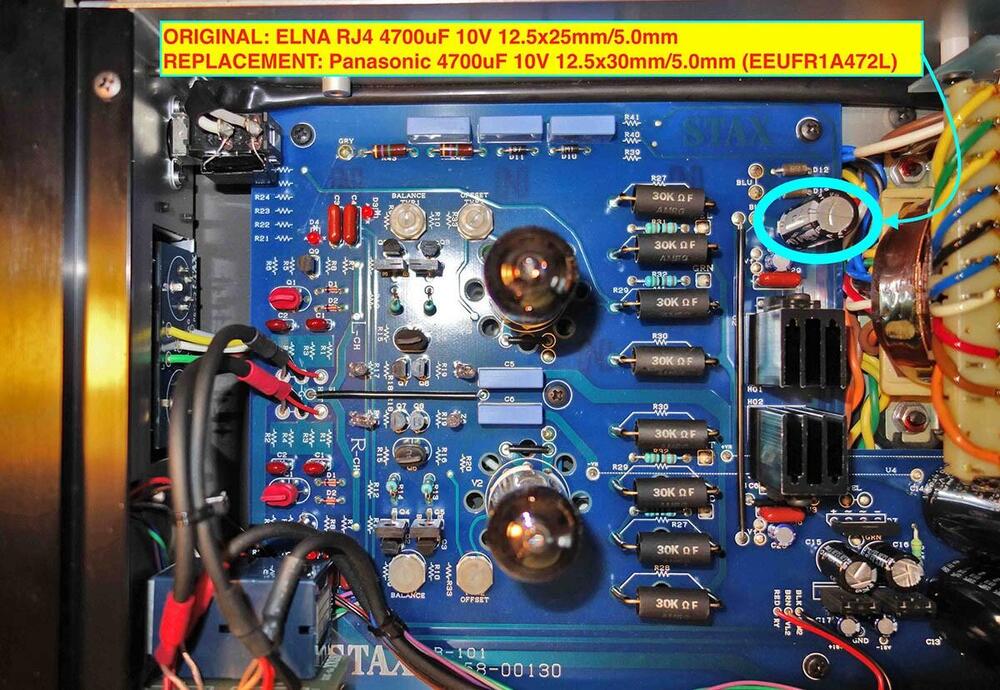
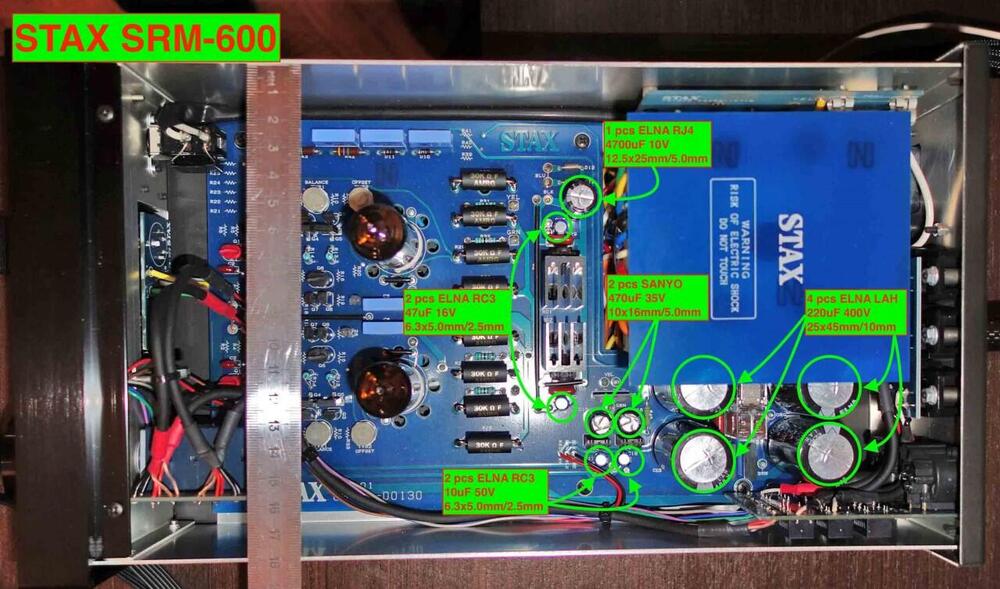
Folks, I replaced all the electrolytic capacitors in my SRM-600. I can't say for sure if this has happened before, but this (photo) capacitor at 10V 4700uF is heating up. Not very much, around 55C. The headphones aren't plugged in. Can you tell me if this capacitor is in normal operation? Does it have to warm up? My SRM-600 for 230V voltage. First, I supplied a cheap Jamicon TKR472M1AJ26 capacitor. It was heating up.Then I decided to place EEUFR1A472L Panasonic Low ESR capacitor. However, it's warming up, too. I checked the diodes next to it - they're not broke. On the cap about 7V. Any other caps running cold. Only 4700uF/10V running warm. I double-checked all capacitors parameters and they match (or exceed) the original: Original: ELNA LAH400V221MS36 220uF 400V 25х45mm/10mm <--- Rated ripple current (RRC Arms) = 0.87 Replacement: TDK/EPCOS B43642B9227M0 220uF 400V 25x35mm/10mm <--- RRC = 1.03 & ESR at 100 Hz = 460 & Impedance = 680 Original: ELNA RJ4 4700uF 10V 12.5x25mm/5.0mm <--- RRC = 1250 & ESR = 0.11 Replacement: Panasonic EEUFR1A472L 4700uF 10V 12.5x30mm/5.0mm <--- RRC = 3630 & Impedance = 0.013 Original: SANYO 35ME470HC 470uF 35V 10х16mm/5.0mm (S.E.8N Black 85°C Standard series) <--- RRC = 585 Replacement: TDK/EPCOS B41888C7477M000 470uF 35V 10х20mm/5.0mm (B41888C7477M000) <--- RRC = 1500 & ESR at 10 kHz = 0.050 & Impedance = 0.046 Original: ELNA RC3-16V470MF0 47uF 16V 85°C 6.3x5.0mm/2.5mm (RC3 F0 Blue 85°C) <--- RRC at 85°C = 70 Replacement: HITANO E5R 47uF 25V 105°C 6.3x5.0mm/2.5mm <--- RRC at 105°C = 60 Original: ELNA RC3-50V100MF0 10uF 50V 85°C 6.3x5.0mm/2.5mm (RC3 F0 Blue 85°C) <--- RRC at 85°C = 40 Replacement: ELZET CD50H 22uF 50V 105°C 6.3x5.0mm/2.5mm <--- RRC at 105°C = 40 Before the replacement, I did not check if the 4700uF/10V had been warmed. This could be his normal operating condition. It is simply not clear to me which components of the circuit can affect it: from the transformer comes two BLU-wires at 6.3V AC current, then there are two diodes in parallel converting to DC current, and then there is a 4700uF/10V capacitor, which receives these 6.3VDC. There is simply nothing to break. Any suggestion?
-
Hope you guys don't mind, but I'm taking the liberty to collect some info, links etc. here. 900V floating supplies 350V/us the cole slew (couldn't resist) seems to be happening in bits and pieces in multiple threads on multiple forums and there are some implementation issues which seem to be worth discussing...namely fitting all of this somewhat daunting amplifier into one case. I guess at some point Kevin decided to split the input and output stages- output board output schematic The output stage features the floating supply floating supply fboard floating supply schematic the input/driver board As of today the aim is to fit this all in a single modushop 5U chassis, the floating supplies make it prohibitive to split the build across multiple boxes. Transformer Specs: Supposedly trivial to get an EL34 version of this working but SiC version will be first Just wanted to hopefully direct discussion here instead of dragging it across the kgsshv/GB/headfi threads. I'll update this when I get around to fishing around for the appropriate information. Thanks to Kevin for making the design process somewhat transparent ---------------------------------------------------------------------- Figured I'd put this here too, since Kerry speaks for all of us:
- 256 replies
-
- Circlotron
- High Voltage
-
(and 1 more)
Tagged with:
-
Hey all , so this is my first post here so sorry if its not up to par. Recently i bought a Srm-006t amp 404 signature combo . I loved the sound but it seriously lacked volume . I replaced the tubes with a new set of EH tubes .. but aside from a uptake in tone .. I didn't get any extra volume . I started searching Google for mods to this energizer and came across a post by Kevin about a cascade mod for this amp and mention of an article in Audio Express July 2017 edition by James Lin. In the thread i was reading i saw that a board had been designed (im really not a fan of point to point electronics) and messaged Kevin Gilmore about it , He said he was all out but happily sent me the screens for it and permission to get some more made . So this is the start of this roller coaster of a mod , I've learnt a pile about Stax and I've had some great help from some of the best in the bizz to produce what is a good looking addition to my amp with significant results in both volume and audio quality . So I found a place to make them and got a few made , and then populate the board with the parts listed in the article ( there was a small design change of the board from the article but ill talk about that later ) board completed ( the pot was changed to 5k and the set resister to 390ohm ) This was due to a design change from the article , The original was in series and would get scratchy over time from the current demands on it , The board mounts the resister and the trim pot in parallel meaning only a tiny portion of current is passed through it increasing reliability . So here was the first mistake ... you can't put in the wires that go down to the board after the heatsinks are installed , Also pro tip ... attach the resisters to the heatsinks and fasten them , Then install into the board as a unit .. makes it as easy as just inserting the resisters instead of trying to do paste insulators and bolts up when the back in shrouded with the previous heatsink . However it was all together and it looked great. Now to set the current limit . you can see the wires coming out the wrong way because soldering down in between the heatsink was difficult and i was lazy . So now we clear out the plate resisters , If you have never soldered before of don't know how to remove solder from a connection well ... this is not something you want to do , The boards are a little fragile and success relies on you been able to clean out the holes well . a flux pen and solder wick is your friend . I believe its been said that once you can work on a 5 layer board without damage you can work on Stax . so practice practice practice This picture also shows the 4 wires you will attach 5.1k safety resisters to in series to keep your stax safe and your head safe should the worst happen Next mistake ... mounting HV over the input side , This isnt how kevin designed this to be attached ( i think) but id ordered the standoffs and they were there .. it also worked well with how id run the wires out the top of the board , ultimately in hindsight this was just an epic fail and again i was been lazy ... however this is very unwise when you are dealing with 580v ... don't be lazy .. don't be impatient .. I knew better this this but after weeks of waiting for parts and boards i just wanted to hear what it sounded like . Also .. you cant get to the balance pot to do tube bias so in order to do the bias .. you had to remove the board from the mounting ... did i mention this was a fail in so many ways So this is when it all went wrong . I hung the assembly over the side so i could set bias .... and this is where the little things id done poorly bit me in the arse . The article says just use an insulating pad because the back of the fets are live . So i did that and plastic collets and metal fastenings (no contact to the fets were made and for anything lower volts this would of been fine ... However for 580v .. this was not ok .. it arc's through and made the heat-sink live with MUCH jumpy electrics . Luckily i hadn't touched it with my hands because in my laziness and rush . i didn't connect the earth off the board to the actual earth ... something that incredibly foolish and stupid .. but hey ... i hadn't worked on electronics like this in 20 years so i was a bit rusty in remembering the fundamentals of safety safety safety ALWAYS install your earths . The result was catastrophic the heat-sink arc'd with full force to the body of the unit . I shut it down to assess the damage The result of this was a Amp that no longer functioned , I messaged Kevin and told him exactly what happened and owned the mistake like you should . I guess he took pity on me for been stupid and organized Spritzer to send me a high res copy of the T1 schematic . As well as a few suggestions on where to start as well as the frightening reality that i may have killed the input fet , A part no longer manufactured . So i reinstalled the plate transistors (something you don't wanna be doing on a fragile board in installing and installing parts repeatedly so much care was taken . Obviously my attitude to this mod had changed from smash it through to one of respect for the gear , something i should have had from the start. So now comes the fun part .. tracking voltages and testing on gear that you are directing testing on the HV rails and components . i even changed the multimeter to one that was rated for HV rather than just the junker I use that I don't really care about . After a few hours of testing all the resistors around the d3 LED , i moved on to the power section , The great think about this amp its its discrete , so EVERYTHING has a matching part , I was lucky i had only killed one side . Slowly making my way through i found that the STAX schematic had errors in it .. That worried me a lot but luckily its a simple circuit and tracking voltages is easy ... turns out id open circuited a resister named R44 and that was all that was damaged Sadly to rebuild the board it was just easier to strip the old one apart ... and i did that destructive because reality is ... its way safer than putting lots of heat into fets to remove them from a board (10n90s is not available locally it got shipped from mouser usa ) I also could see the Dn2450 has sweated and i had a spare set to just replace them with . So we started again ... much more carefully this time and using 1kv insulation pads and fastenings on the fets [ edit .. going to move up another step to ceramic insulators and peek fastenings, following some good advice , i suggest you do the same ] Using nylon bolts and nuts and installing the fets on the heat-sink before removing the solder to help keep the heat in the fets from that process under control (i was been super careful of everything now ) Yes there is to much paste .. i wiped them down pre installation but the nylon nuts have way less clamp so i wanted to be sure there was substantial contact As you can see the wiring is now coming out the right way , Now back into testing ... and here is where it got interesting , The new batch of 10n90's (bought from Rs components as extras rather than mouser) caused the original 390ohm resister to not allow me to set my current value to .49 volts . My lowest range was .52v (approx 6 mA of draw ) while this might seam like a good idea (a little more current is a good thing ) i was thoughtful of if the transformer could supply more that so i added another 100ohms (making 490ohms) to the set resister and this put .49v set at 4.9mA draw as per the article specs All wired in and ready to mount Mounted and looking good ...... [except this isn't how it should be mounted , as pointed out mechanically the heatsinks need to be vertical so will be remounting ASAP will add updated pics as things are fixed ] Bias set and time to listen The difference this made is ASTOUNDING , It fixed all the things that annoyed me about this amp and its total lack of drive . So this was my little adventure , I hope its helpful to someone wanting to do this and also helps show some of the pitfalls and dangers of doing something that you just don't everyday Also hope it helps someone with the construction order . I really need to give credit to Kevin Gilmore for sticking with me through this and to Spritzer for giving me a high res schematic to work to, Without that i would have been dead in the water come diagnostics time as well. Also James Lin for what is basically a how to article Who should do this mod , Anyone with good soldering skills , A person that respects HV and the dangers of working with it . And also have the expectations that if something goes wrong , if you make a mistake , You COULD brick your amp in a way that makes it unrepairable and that that, is all your own fault . BTW . the guy that says he will do this for you .. is not the guy you want doing this for you . Also note edits and updates... Cheers all Wayne
- 35 replies
-
- 6
-

-
- stax
- kevin gilmore
-
(and 3 more)
Tagged with:
-
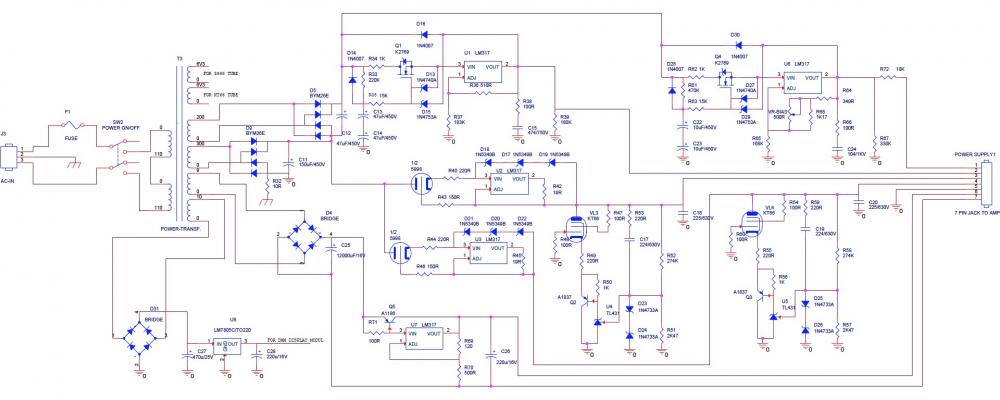
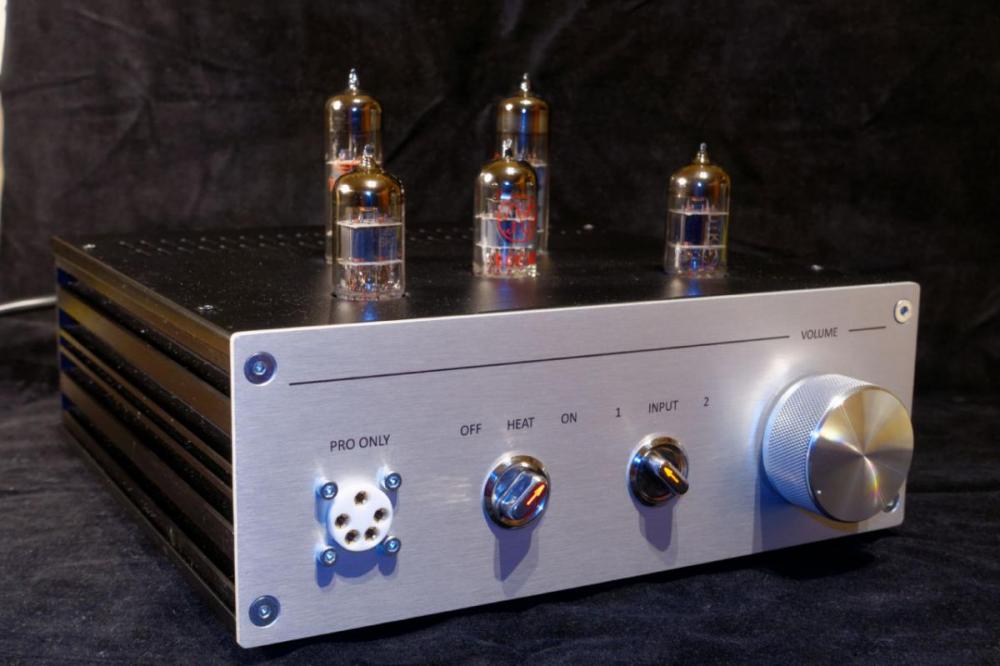
After a few weeks burn-in period of this little beast, I found it's very relaxing to listen to. I can hear more juices coming out and the STAX 009 just doesn't have that analytical sounding cliché to my ears. It also enhances the soundstage and life-like of Focal Utopia makes it way more enjoyable to hear. This is a push-pull design tube Headphone Amplifier/Preamplifier attempting to achieve the true high-performance of headphones from Dynamic, Planar Magnetic to Electrostatic models. I've gotten a few PM's asking about the schematics and stuff so I decided to open a thread to discuss more here. a few interesting measurements of the amp at R = 6Ω DT-HWT Headphone Amplifier/Preamplifier schematic: DT-HWT Power Supply schematic: ===================== Inputs – it has two sets of RCA inputs. Output – it has different outputs, provided on a number of different connectors. On the amp front is a TRS ¼” unbalanced jack, and balanced headphone outputs on a single 4-pin XLR and a pro bias 5-pin Stax headphone jack. On the amp rear, there are two sets of 3-pin XLR and RCA preamp outputs. Both sets can be used at the same time if desired – for example, you could feed a power amplifier from the XLR connectors, and a subwoofer amp from the RCA connectors. The bias voltage settings on the separate power supply unit are used only with electrostatic ear speakers (> 100K Ω impedance). You can select whichever bias level sounds better to your STAX/HE90 models from 230-500-580 up to 620 V DC bias. Tube complement for the amp unit is: matched pair of EF86/E80F/6D8 & matched pair of 12AU7/5814A/E80CC/E82CC & matched quad of EL95/6AQ5 Tube complement for the power supply unit is: matched pair of KT66/KT77/KT88/6550/6L6/EL34/350B/350A & one 6080/5998/6AS7/6H13C/2399 Look forward to those next iterations/variants from you guys soon... For the meantime, I keep on rolling 11 tubes to find the best combination that suits best for different music genres
- 47 replies
-
- 10
-

-
Dear fellows, Maybe you can help me with an advice. A friend of mine gave me a Koss head amp E/9B but without the suited headphone. I want to know whether it is possible to play a Stax headphone (normal or Pro Version) through this head amp. If it does not work - it is possible to convert the Koss working with a Stax headphone, maybe by building an adapter? Many thanks in advance. I wish you a great happy new year 2018. Best, Andreas
-
Thought it might make sense to make a new thread on this so as not to pollute the T2 thread. So this would be limited to the chassis, any potential board run, and any other potential group buys for traffos or transistors (if numbers warrant). I am hoping to move forward by the end of the week. Please keep in mind, if you are in and make your deposit, you are committed and will not back out unless you find someone to take your spot (so if you are not well established, then paypal gift only). Please express interest here or by PM. I have also included a link to the results of the first group buy:
-
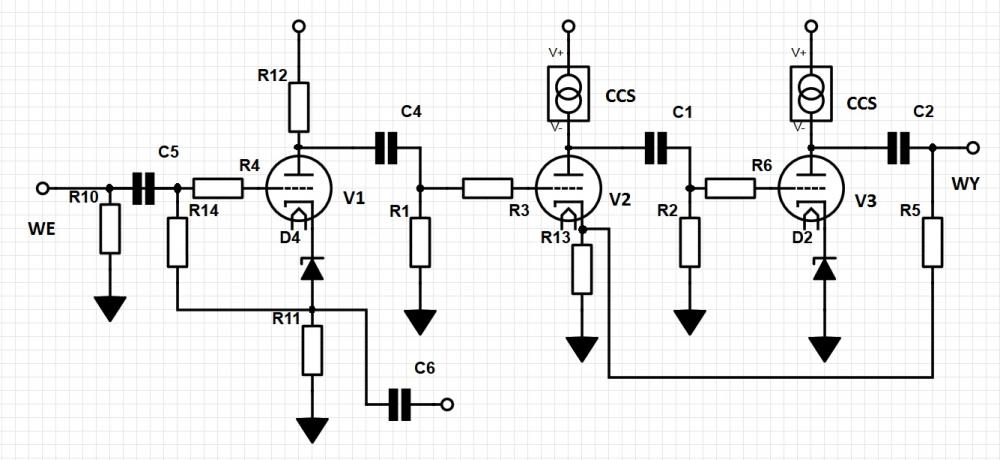
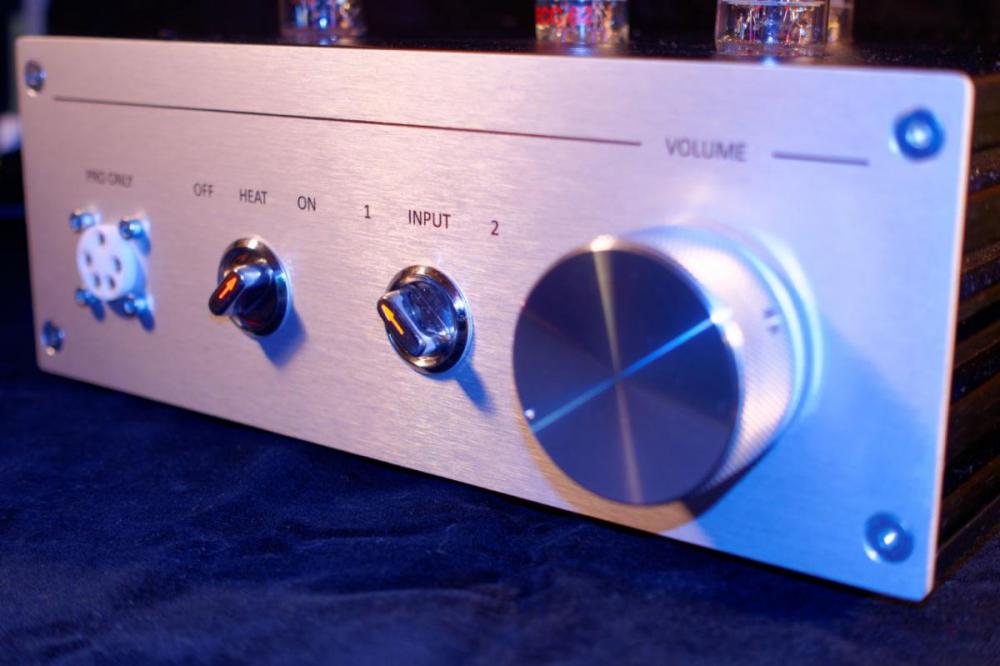
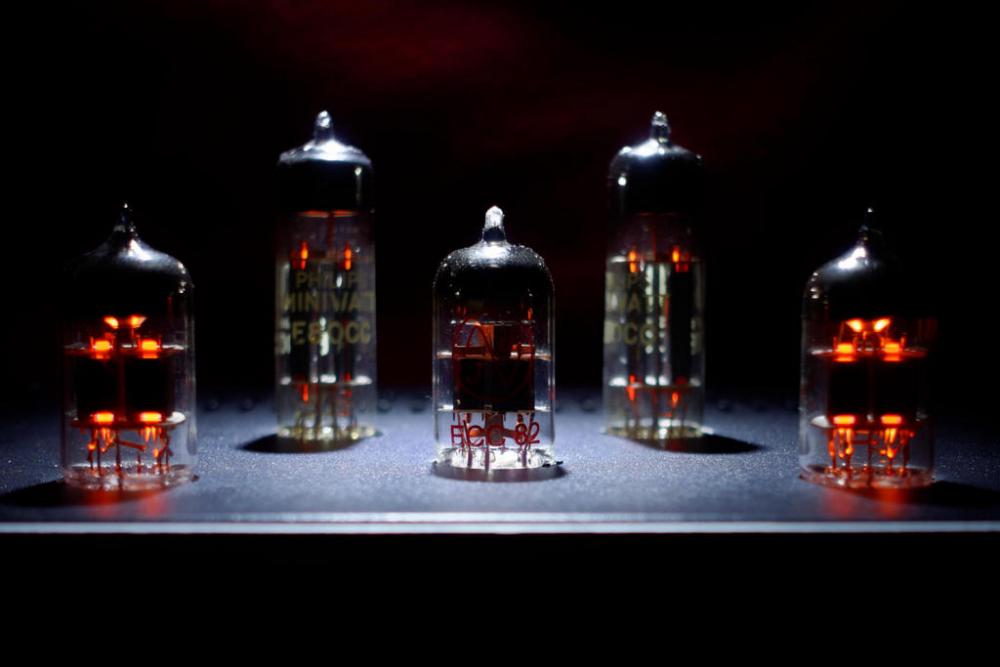
Hello My little amplifier for my Stax headphones. First stage is based on ECC82. One triode per channel as cathodyne phase inverter. The second stage is 6N1P-EW with CCS, and power stage is with E80CC with CCS too. It was designed to work with my PC to drive Lambda Pro. So output voltage is not so big 308 V peak-peak, but it is enough for Lambda Pro.
-
I recently acquired a set of SR5N earspeakers, with white color. I am asking that how can one's decide if it is a gold editon or not?
-
Due to my impending move at the end of the month to a new and bigger house it is time to have a moving sale. All the amps I have in stock (so not the KGSSHV Carbon as I can't make enough of them) are included plus all the special items I have as well. They are all discounted by 15% and free shipping worldwide is included. See the News section of my site for a complete list of everything included or just click here. The sale will run from noon today (UTC) to midnight on Sunday the 17th. Everything is in stock and ready to go so shipping is expected a week from final payment. Could be less, just depends on how busy I am. Now I'll get back to packing...
-
hi all, i am a new owner of a lambda SR. i found it cheap on craigslist, was not expecting to see one, went and snatched it up for cheap. it looks fairly dirty on the inside and i have been looking at some guides where people describe cleaning lambdas but the process is a bit intimidating... it looks like there is a lot of dirt inside. i wasn't aware dirt was so hard to clean off of them before i bought them, and there are 2 visible specks of dirt on the left driver on the inside. that driver usually buzzes a bit, sometimes not too bad but sometimes a bit louder. when you look down into the driver housings you can see lots of dirt that looks nasty and gross. i am using a new SRM 323S i bought from Stax USA website. i do not have any other stax headphones to use with the amp but since i can see the headphones need a good cleaning. where do i go from here? i am not scared of working on electronics, this is just such a precision device i am scared i'll damage something. p.s. how do you remove a lambda headband? the headband on this is very gross and i wish to wash it off a bit. (edit: didn't notice there was a stax thread like a big idiot, tried to delete this thread and re-post my message there but please remove this thread if necessary)
-
I've got a Studer amp to keep my Stax menagerie under control via the SRD-7 Spritzer. It has always had quite marked mechanical hum when run at 240V (Australia's mains voltage). I have a 240 -> 110V transformer and the Studer is able to be configured to almost any possible mains voltage via a rotary switch and with a change of fuse. Did that. NO FREAKIN' HUM! $2.50 for 2 new fuses! Love it.

