The following are copy & pasted text (original sources: spritzer and kevin gilmore).
You use a normal multimeter set at DC voltage, the lowest voltage level (20volts or less). The amp is powered on when you do this with the new tubes inside. Never pull out tubes when amps are turned on. Only do so when the amp is disconnected from the wall. Leave the amp on for two hours so the new tubes can stabilize. You measure in the Stax plug on the front.
First you measure between + and - on one channel and adjust TVR1 and then put the multimeter between + and the ground post at the back and adjust TVR2. Both are adjusted for zero. They pots are clearly marked on the PCB for each channel.
Be very careful inside the amp because there are some hundreds of volts floating around. I use a special screwdriver that is only bare metal at the very tip to adjust but plastic screwdrivers are also good.
--------------
There are 2 pots per channel.
One of them is the differential pot, and you
put a voltmeter between The two output pins
and adjust for zero. I believe this pot is labeled TVR1
For left channel voltmeter goes between yellow and green
for right channel it is white and red
The other is the dc offset pot, you put a voltmeter
on either output pin and ground and adjust for zero.
I believe this pot is labeled TVR2. For left channel voltmeter
goes between yellow and ground, for right channel it is
white and ground.
You have to do this a number of times, and new tubes drift like crazy.
--------------
This is the procedure I got from a Stax tech. Believe me it was hard to get.
All adjustments are to 0 volts.
Adjustments for pots Tvr 3 & Tvr 4 .
1- Tvr-3 put voltmeter leads between testpoints of Tp1(little silver circles on the board near each tube) and adjust tvr3 pot
to 0 volts.
2-Tvr4 put voltmeter leads between testpoints of tp2 and adjust to 0 volts.
3- Tvr1 put one voltmeter lead to tp1the other to tp2 and adjust tvr1 to 0 volts.
4- Tvr2 One voltmeter lead to tp1 the other to ground and adjust tvr2 to 0 volts.
Repeat procedure for other channel.
doesn't matter which channel you start with.
You may have to repeat this procedure a few times untill tubes stabilize.
1)Yes you are measuring DC voltage, set meter to dc volts.
2) The amp has to be turned on and plugged in and stabilized. let it warm up for a few minutes.
--------------------
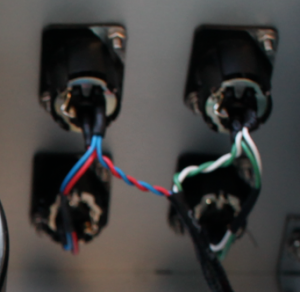
Take a voltmeter and put the probes on + and - on an output jack and adjust TVR1. When it is hovering close to 0v you take the - probe and connect it to ground on the amp (i.e. the case) and adjust TVR2 to 0v. See the pic for the pinout
In a stax 006 or 007 there are 2 pots per channel that
need adjusting when you change out the tubes.
In a 006 you try to balance the sections of a tube.
In a 007 you try to balance 2 tubes to be the same.
(2 tubes per channel instead of 1)
One pot is the dc balance between the sections of a tube
and is measured between pins 3 and 4 of the headphone
connector. (2 and 5 for other channel) Set it to zero.
The other pot is the dc offset and is measured between
pin 3 and chassis (pin 2 and chassis for other channel).
Set it to zero.
You will have to repeat this a number of times to get it right.
--------------
have an 007 here i'm doing a little work on...
1- Tvr-3 put voltmeter leads between testpoints of Tp1(little silver circles on the board near each tube) and adjust tvr3 pot
to 0 volts.
This balances the two sections of one tube.
2-Tvr4 put voltmeter leads between testpoints of tp2 and adjust to 0 volts.
This balances the two sections of the other tube.
3- Tvr1 put one voltmeter lead to tp1 the other to tp2 and adjust tvr1 to 0 volts.
this balances the output of tube 1 with respect to tube 2
4- Tvr2 One voltmeter lead to tp1 the other to ground and adjust tvr2 to 0 volts.
this balances both tubes with respect to ground
Repeat procedure for other channel.
You will have to repeat this many many times...
Best to use a tube tester and check the tube for balance
between the sections of the same tube first. The closer
the two sections are to each other, the less trouble you will
have.


